Saturday, October 31, 2015

Dial making Pt.7

I turned small bushes in the lathe. Some of them is for dial parts. Lever and jumper spring will be screwed on them.


The parts requiring strength were made from steel rod. Deburring is needed.


With M1.0 thread.

Monday, October 26, 2015

Dial making Pt.6

I am making the inner movement holder from brass. Layered dial parts will be screwed on it.
It is a very simple structure but accuracy is needed.


Cutting the opposite side.

Making M1.0 thread and two through holes for screws to fix the holder to the case.


Thursday, October 22, 2015

Dial making Pt.5

Steel-made index. After processing at lathe, hour and minute points were made. I drilled 60 holes one by one with rotary table.


I will ink in these holes before case assembling.

Wednesday, October 21, 2015

Dial making Pt.4

I made the bridge for holding the jumping hour wheel.  Drilled some holes for processing guide.

I milled it carefully...


After sand-blasted, chamfered the edge and polished.

Sunday, October 18, 2015

Dial making Pt.3

Fix the dial on the board with a handle.

I use garnet sand. Commonly it will be used as bottom sand for raising tropical fish.


I drop sand to the dial from above. Yes, this is very simple way. But it is effective.

After six times sand blasting. It will be enough.

I polished up the chamfered part with sandpaper and diamond paste.
Brass base part of the dial was completed.

Saturday, October 17, 2015

Dial making Pt.2

Sandpaper the surface. No need to make the mirror surface. 

Fix it to the jig and start cutting.


Chamfer the edge at 45 degrees.

Applied perlage pattern to the surface.

This is preparation for sand blasting.

Making the Dial of Jumping Hour

I tend to produce another version of the dial for jumping-hour model.
Using brass mainly, blue-steel hands will be fitted for more classical(?) looking.

Working at compact milling machine with rotary table.
Centering...

Making from 1.2mm thick brass plate.

Drilling some holes for fixing screws and etc.


Cutting the outline and step for index parts.


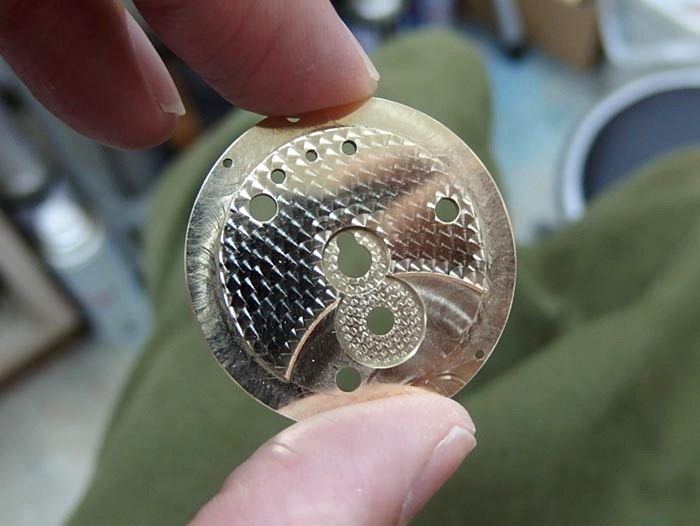
The blue circle shows a failure point. However, it is correctable. It was just going to start again from beginning. It was close...

It was cut off by coping saw. Vallorbe saw has very sharp blade and easy.

Fix the failure part...


Applying 'Perlage' circular decoration pattern by using rubber bonded wheel. The tip diameter is 1.5mm.

I changed the jig and applied it on the center part too.

Finished in this way.